New in the Shop: Make Believe Art Print

Jamie Bartlett Blog Post Art, Children, Etsy, Hand Lettering, Shop 1497 Views

My friends always joke with me about how they are going to send their kids over my house to have craft time and art class. I honestly can’t wait. There’s going to be lots of finger painting, noodle necklace wearing, and make believing. In my opinion there aren’t very many things more important to childhood than that and what better way to encourage creativity than with a fun art print?

You can find our new Make Believe art print in our shop!

Jamie BartlettNew in the Shop: Make Believe Art Print

Love is an Adventure (in Michigan)

Jamie Bartlett Blog Post Hand Lettering, Michigan, Photography, Vacation 2333 Views

Remember way back this summer when Jake and I went to Michigan? Yeah, well these are the rest of the pictures that I never got around to posting. The lettering on the picture above was from a project I did for a client. I loved how it turned out so I had to share it.
Our life has definitely been feeling like quite the adventure lately. All good and exciting things just lots of changes, goal setting, and hard work happening. We’re finishing this year strong and anticipating all the goodness 2015 has to offer. I’m sure there will be an in depth post coming to the blog at some point…anyway back to Michigan.
Neither of us had been to Michigan when it wasn’t covered with feet of snow since our wedding. While we love getting to experience Michigan winters (for a few weeks at a time), it was so nice to get out into the woods and see all the greenery this beautiful state has to offer. I grew up with 40 acres of woods to explore and something about Michigan’s woods is so nostalgic and magical to me. 
Also funny story…we went into these woods with my Grandpa’s Leica film camera because we thought it would be fun to get some shots on film and take advantage of not having this type of landscape to shoot very often. Well we did exactly that only to find out later all the film pictures we had been taking throughout our entire trip never got exposed on the roll of film. The film never caught onto the spool so we didn’t get any. Needless to say we were pretty bummed. 

This trip was so fun and relaxing and I’m finding myself wishing we could go back soon. Michigan if you treat us this good every time we visit we might just have to stop by more often. I’m thinking I might need a good ol’ Michigan fall fix one of these years.

Jamie BartlettLove is an Adventure (in Michigan)

Over at Sugar and Type Today

Jamie Bartlett Blog Post Feature, Interview 1258 Views

I’ve said it once and I’ll say it again. One of the best things about social media is meeting new friends that are sweet, inspiring, and just plain awesome. Ilana from Sugar and Type is one of those people! Head on over to her blog to read our latest interview we did with her and while you’re there check out her work too because it’s fab!

Have Instagram? Let’s be friends too! Follow us @apairofpears

Jamie BartlettOver at Sugar and Type Today

Monday Morning Giveaway!

Jamie Bartlett Blog Post Etsy, Giveaway, Hand Lettering, Stationery 1510 Views

I know I know It has been forever since I posted regularly on here. But would you forgive me if I did a giveaway for you!? Head on over to my Instagram (@apairofpears) to find out all the details.

Jamie BartlettMonday Morning Giveaway!

Say Thanks!

Jamie Bartlett Blog Post Cards, Etsy, Hand Lettering, Lettering, Shop 1567 Views

Sending thank you cards out to friends are always a nice gesture and something I’ve been wanting and needing to do more. So in an effort to always say thank you just like my mom taught me, I decided to design a card for our shop! Now it’s all done and ready to send to all those awesome friends you have that keep on doing amazing things for you. Check out the card in our shop here.

Jamie BartlettSay Thanks!

They’re Here! They’re Here!

Jamie Bartlett Blog Post Art, Design, Etsy, Hand Lettering 1974 Views

A bunch of you have been asking me to make the “too many tabs open” quote into a print and it’s finally in our shop along with two other new art prints! Watch out white walls. I’m covering you up!
Jamie BartlettThey’re Here! They’re Here!

Introducing Greeting Cards

Jamie Bartlett Blog Post Art, Design, Etsy, Hand Lettering, Shop 1646 Views

For the past few months and in between client work, I have been designing more products to go in our shop. It has been quite the process, but this is what I love doing the most. I felt pretty accomplished (and a little nervous) this morning as I added the last of the new products to our shop. Nothing goes into our shop unless I love it 100%. I hope you love them too! Head over to our shop and check it all out. We now have greeting cards along with some new art prints! Whew! I’m going to sleep good tonight.

Jamie BartlettIntroducing Greeting Cards

Summertime in Michigan

Jamie Bartlett Blog Post Family, Holiday, Michigan, Photography, summer, Vacation 2715 Views

A few weeks ago we got to spend some time visiting our family in Michigan. We don’t get back there much and when we do there is usually lots of snow everywhere. We love snow (in moderation) but we were really looking forward to visiting during warmer weather. 
Before we left we we made a list of everything we wanted to do. We had a lot to pack in, but we managed to get it all done and of course enjoyed every minute of it. 
One of the evenings we were there we drove to the end of the peninsula to watch the sun set. In the summer it stays light until 10:00 there. It’s the strangest feeling thinking it’s 6:00 and then realizing it’s already 9:00. 
One of our main priorities while we were there was to try stand up paddleboarding. Jake and I have been wanting to try it for a long time now. When we were back visiting at Christmas we found out you can rent boards at the bay. We almost didn’t get to do it because bad weather was coming in but we rushed down there and managed to get an hour in before the rain came. Jake was a natural. It took me a little bit to get comfortable, but once I did we paddled around the bay together and had a blast!
We also wanted to visit Mackinac Island. We haven’t been back since our honeymoon. That was the first time we rode a tandem bike together so of course we had to do it again. We even got the whole family in on it. Riding around the island is one of our favorite things to do when we go up there and then afterwards grabbing some ice cream and fudge. 

Michigan is a beautiful place. We love the big trees, the bright blue water, and how everything is so green there. I think for each of us Michigan will always feel a little bit like home. 
Jamie BartlettSummertime in Michigan

Tutorial: Learn How To Add Texture to Text

Jamie Bartlett Tutorial Graphic Design, Hand Lettering, Tutorial, Typography 23134 Views

Some of you guys have been asking how I add texture to my lettering so I thought it would be fun to share a little tutorial with you. It’s pretty easy, but if you have any questions be sure to let me know. I’d love to see your results if you end up trying it out!

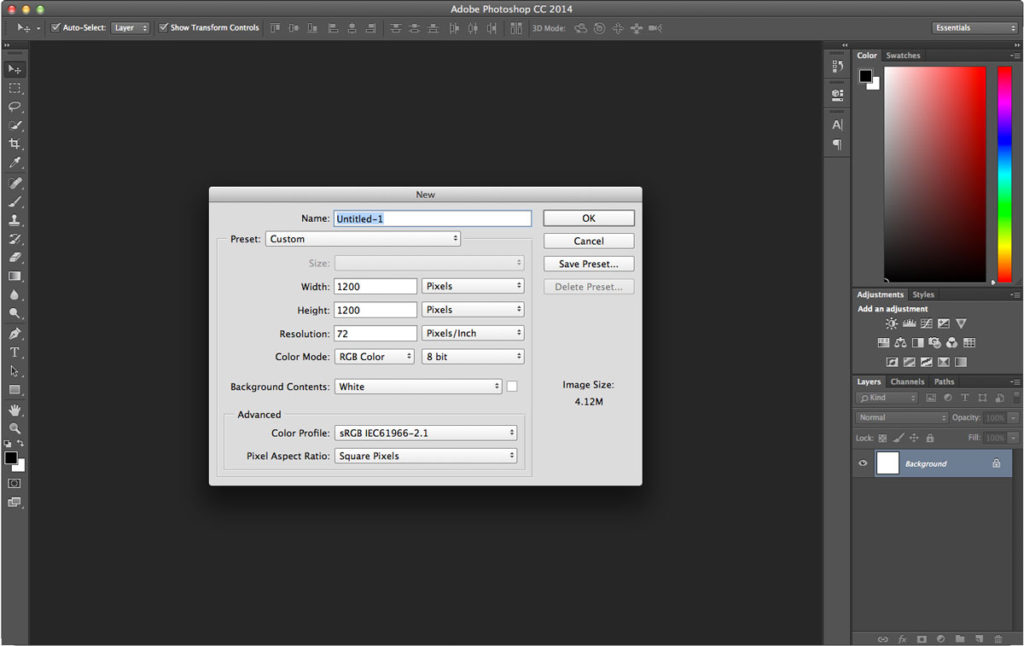
STEP ONE: Start by opening up a new document in Photoshop at whatever size you need. For this project I’m only going to be using this image on the web so I set up my file as 1200px x 1200px at 72dpi.

STEP TWO: On a new layer add in the type/lettering you want to put texture on.

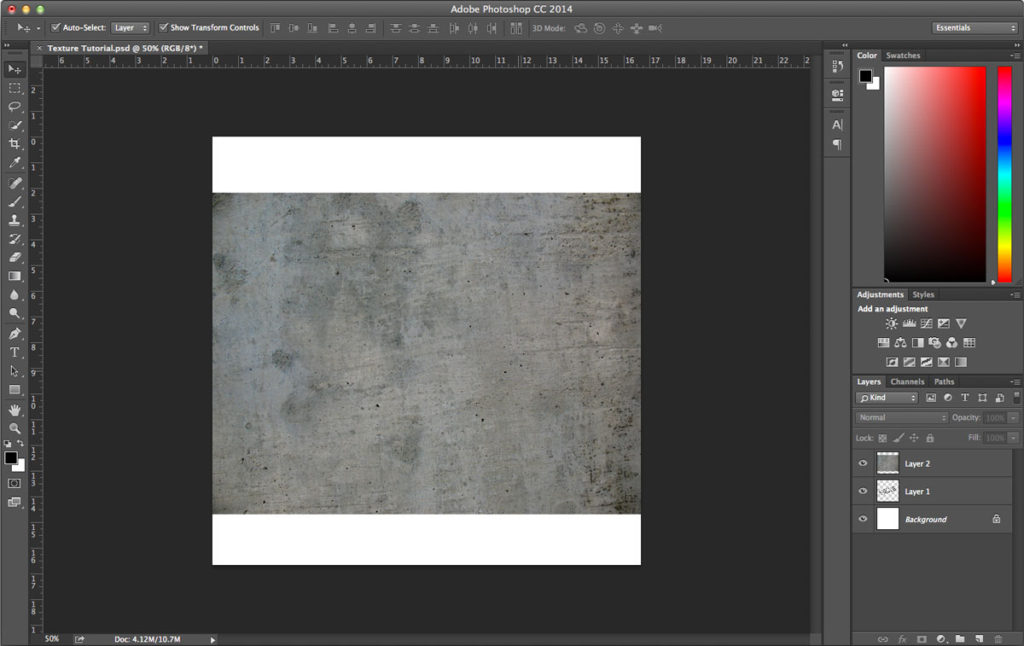
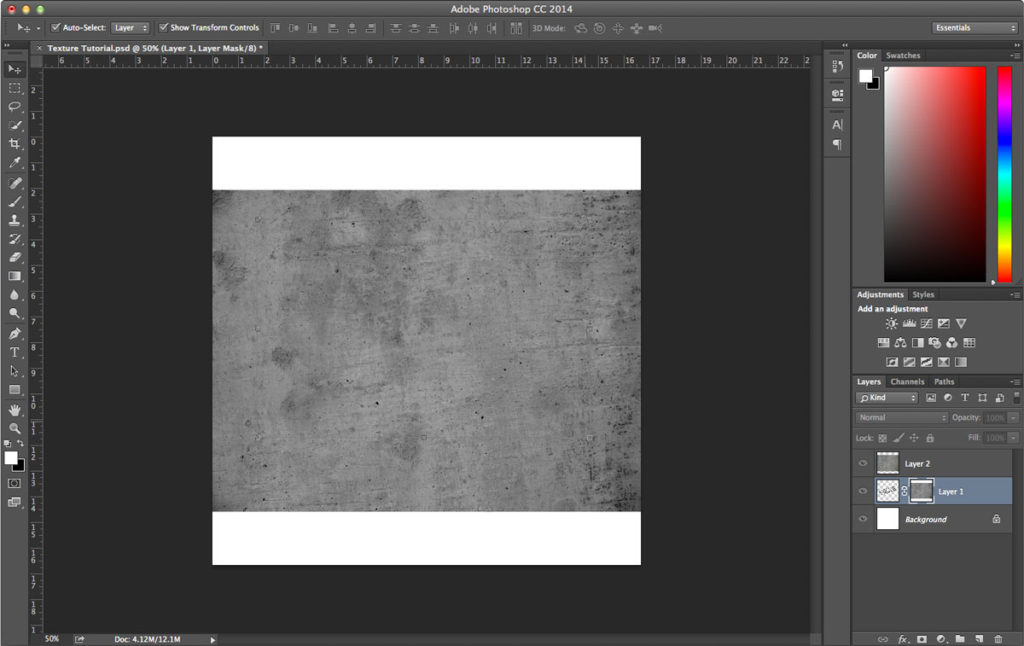
STEP THREE: Put your texture on your canvas. For this project I did a quick google search for concrete texture then copied and pasted it straight from google.

STEP FOUR: Make a selection of the texture layer by selecting all (⌘A) then copy the selection (⌘C).

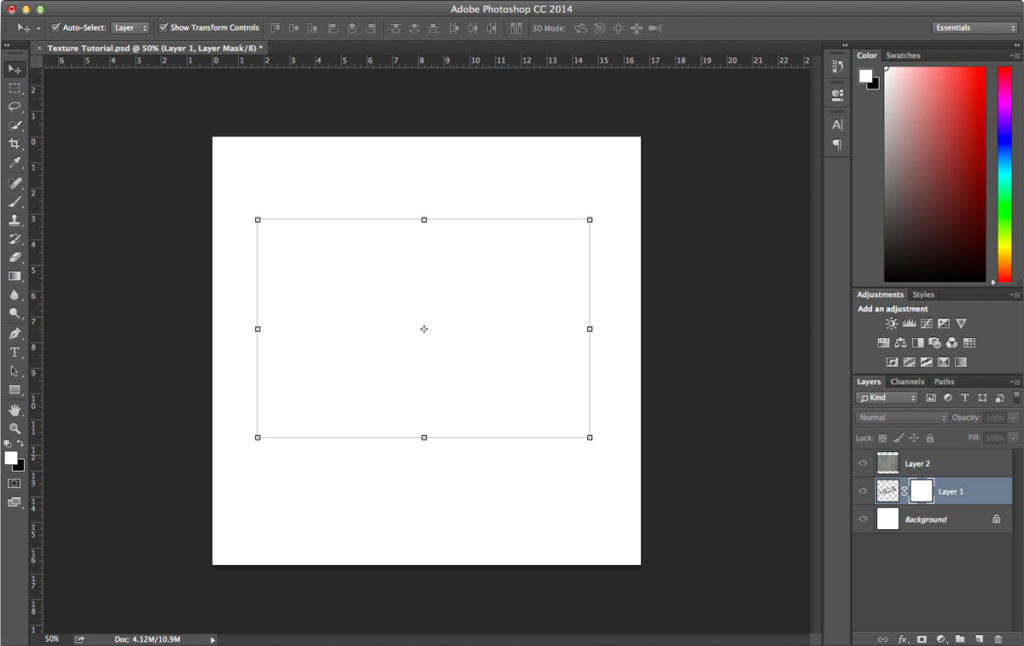
STEP FIVE: Add a layer mask to the text layer. Then option + click on the mask.

Now paste (⌘V) the texture in that mask. Then deselect (⌘D). You can now hide the texture layer. You won’t need that anymore. I usually don’t delete it just in case I want to redo my texture or something later.

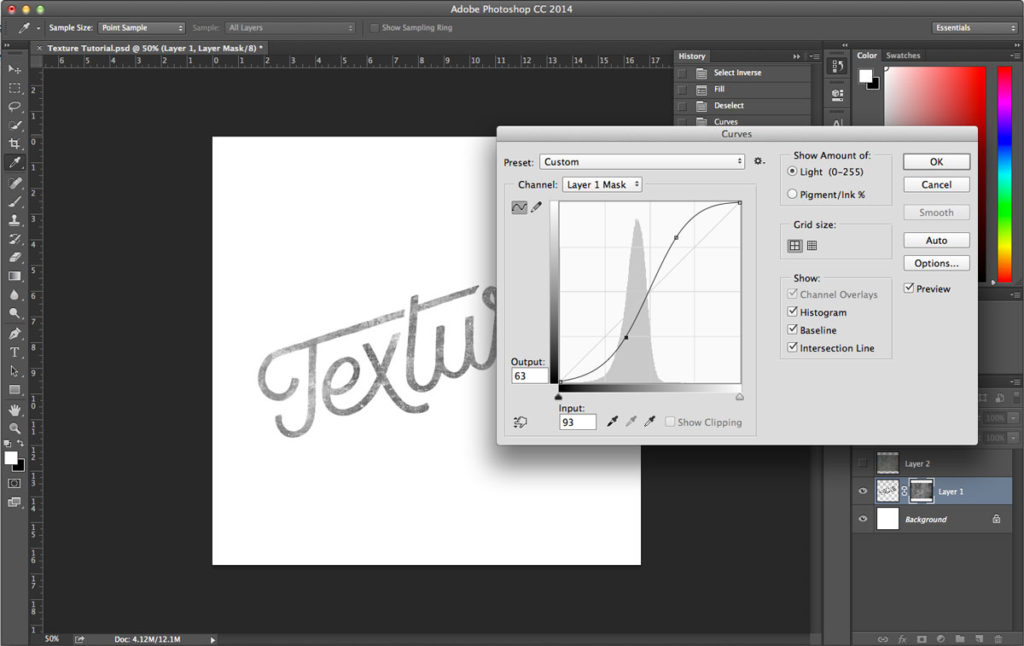
STEP SIX: Next we need to adjust the texture. Bring up the curves palette for the mask layer (⌘M) and start adding contrast. I usually adjust it, click ok, then bring up the curves palette and keep adjust it a few more times until I get it how I want it.

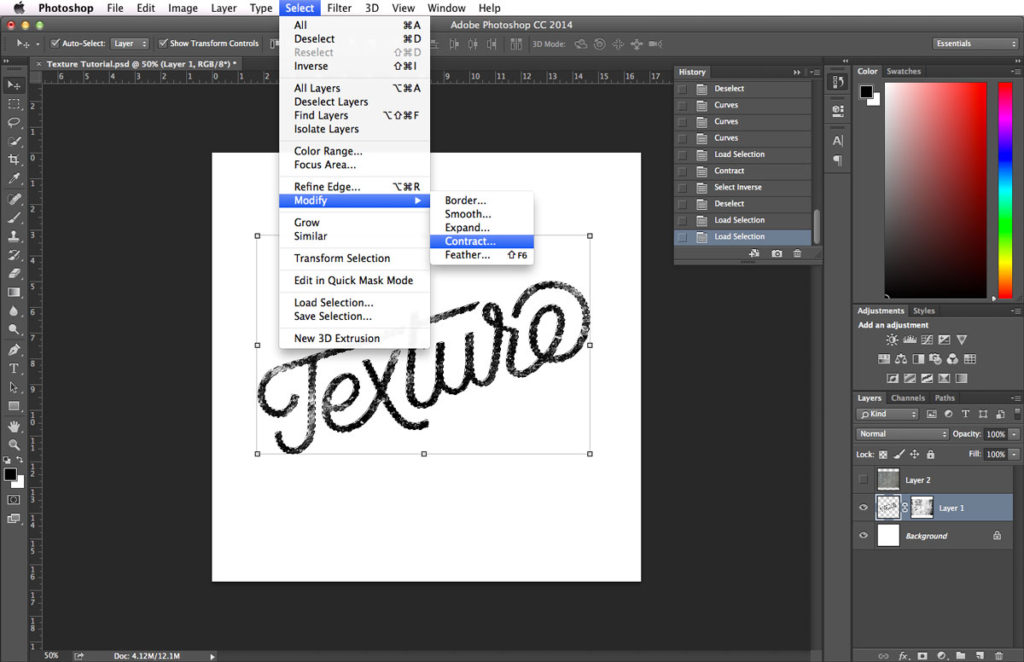
STEP SEVEN: Make a selection of the text by holding ⌘+clicking on the text in the layer palette.

STEP EIGHT: Now adjust that selection by going to SELECT > MODIFY > CONTRACT and contracting by 8px (this number may change based on the size of your document or preference). Then invert that selection SELECT > INVERSE.

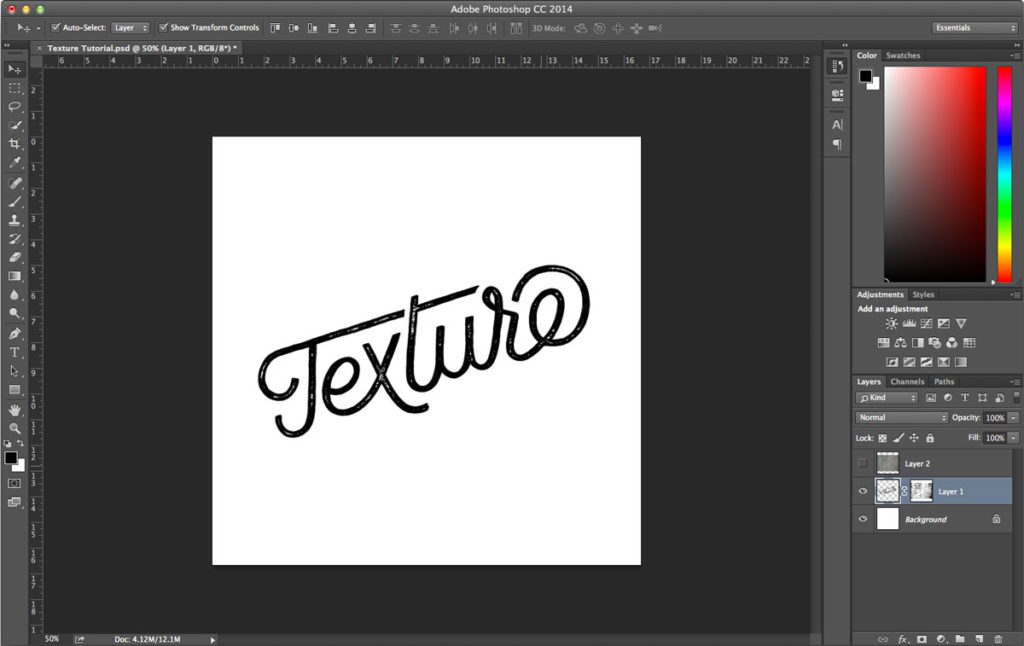
STEP NINE: With the mask selected in the layers palette and your foreground color set to black, hit ⌘+delete to fill the mask with the selection, getting rid of the texture around the edges of the text. You can adjust the curves of the layer mask more if you need to and fine-tune the texture by brushing out any pieces you don’t want. Then you’re done!

Jamie BartlettTutorial: Learn How To Add Texture to Text

Showing 11–20 of 785 results